Ever wonder how to make a mirror glaze cake at home? This show-stopping masterpiece is made doable with some gelatin, chocolate and a range of contrasting colours, so you can cover nearly any cake in this gorgeous coating. The trendy technique may appear tricky to pull off at home, but carefully following these six steps and being mindful of key temperatures will lead you to a shimmering, galaxy-like cake glaze in no time! Just image this pretty pastel version at your Easter feast or springtime tea party.
ingredients
directions
Allow 2 hours for chilling baked cake. Makes glaze for 1, 8- to 9-inch cake. To prevent air bubbles, do not whisk or stir the glaze too vigorously.
Place the smoothly frosted cake in the freezer until very cold and firm, at least 2 hours. Meanwhile, set up your glazing station by placing a wire rack over a rimmed sheet pan. Set aside.
Sprinkle the gelatine into a small bowl and stir in half of the water, ½ cup. Set aside for 5 to 10 minutes for gelatin to bloom. Meanwhile, stir together the remaining ½ cup water, sugar and condensed milk in a saucepan. Bring to a simmer over medium heat. Once the mixture is hot, remove from the heat and whisk in the bloomed gelatine until it melts.
Place the chopped white chocolate in a large, heat-safe bowl. Pour the milk and gelatine mixture over the top of the chocolate. Gently stir until the chocolate melts. Use an immersion blender to make sure the mixture is completely smooth. Keep the device submerged in the glaze to prevent air bubbles. Strain the mixture back into the saucepan using a fine-mesh sieve to make sure the glaze is smooth and to remove any air bubbles.
Divide the mixture into 3 to 4 bowls. Add a few drops of different gel food colouring to each and gently stir until the desired colours are achieved. There is no need to divided the colours evenly – create a larger base colour with a few smaller portions of accent colours.
Add the base colour to a spouted cup or large measuring cup. Pour in the remaining colours and gently stir a little (stirring too much will muddle the colours together). Allow the mirror glaze to cool to 95°F when tested with a candy thermometre – pouring the glaze at the correct temperature is crucial to the cake’s success. If the glaze drops below 95°F, gently reheat in the microwave, 10 seconds at a time, and stir until the correct temperature.
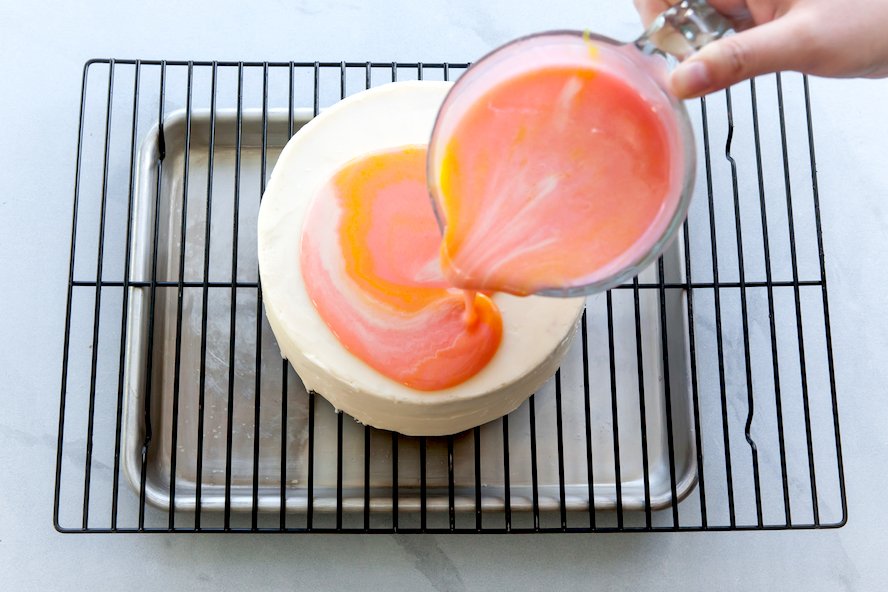
As the glaze cools, place the chilled cake on the wire rack. Once the glaze hits 95°F, pour it over the top of the prepared cake. Starting in the centre, swirl the glaze around the cake. Make sure the glaze pours over each side of the cake as well. Immediately pop any obvious air bubbles with a toothpick. Allow the glaze to set for about 20 minutes before serving (the chilled cake with help the glaze set quickly). Cut the cake with a sharp knife and clean it between slices, and then serve.