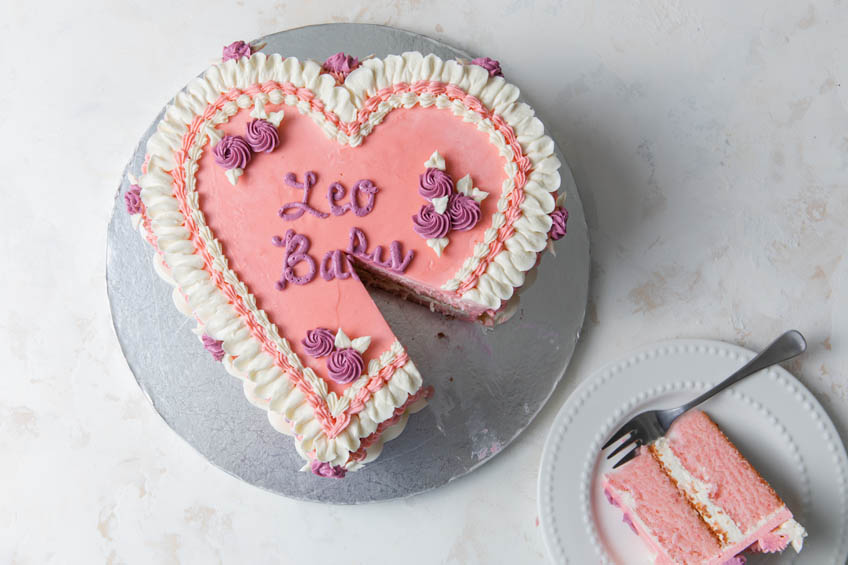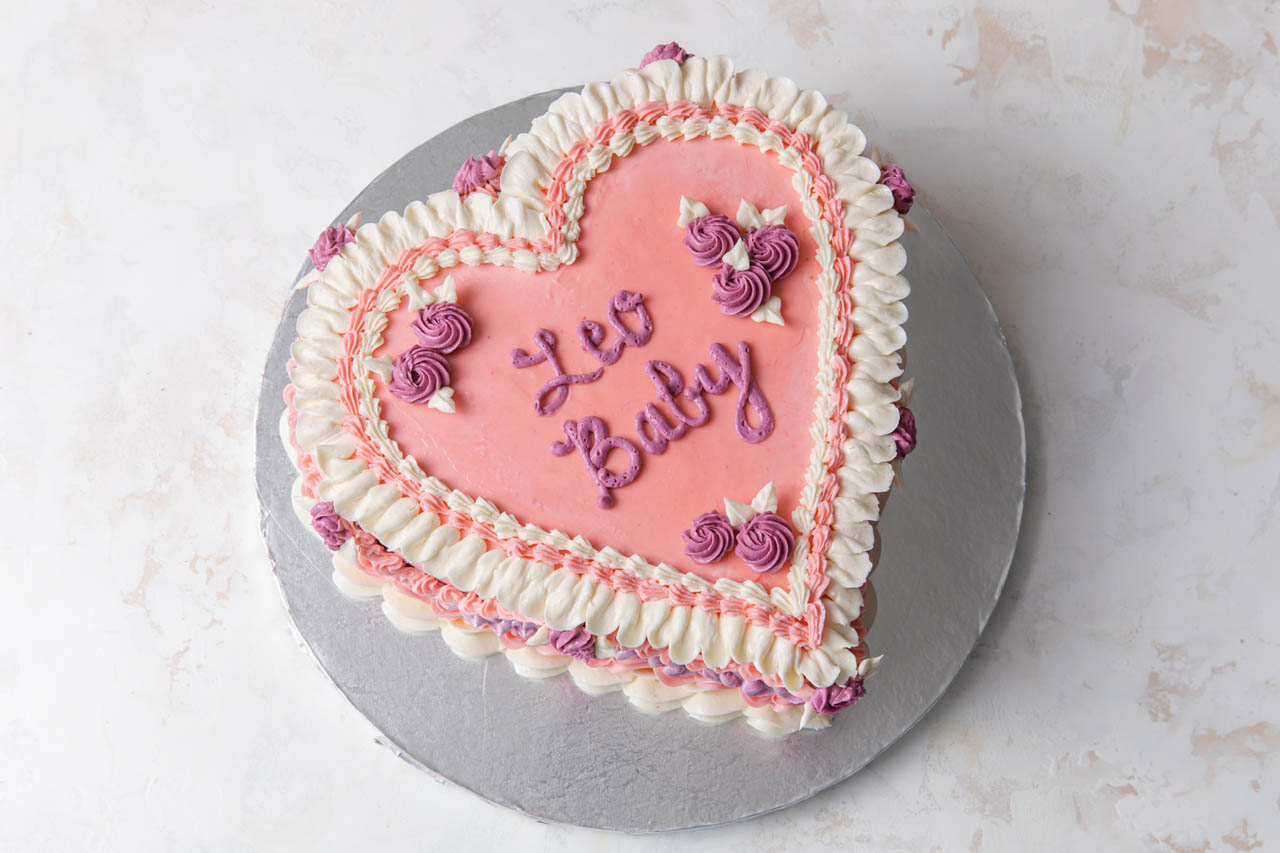
Celebrate the fiercely loving, loyal, confident Leos in your life with this baddie birthday cake! With a mix of vintage buttercream piping and its cheeky message, this cake has the ultimate fun vibes. It can also easily be adapted to any other zodiac birthday you’re celebrating, and the heart shape is surprisingly easy to achieve with just two 8-inch round cakes.
New to cake decorating? Just have fun! And don’t forget the littles details. A simple color palette will help keep you from getting too overwhelmed. You can practice your piping on a cutting board or piece of parchment paper to prepare for the real deal. Just scape off the buttercream and add it back to your piping bag.
When it comes to icing the cake itself, if you are not happy with your designs, you can scrape the buttercream with an offset spatula. Chilling the cake first will make it easier to remove the undesirable bits without disturbing the base of the cake. If the buttercream gets too soft, chill it in the refrigerator to firm up. Don’t leave buttercream in a piping bag in the refrigerator too long or it will be too stiff to pipe.
ingredients
Ingredients
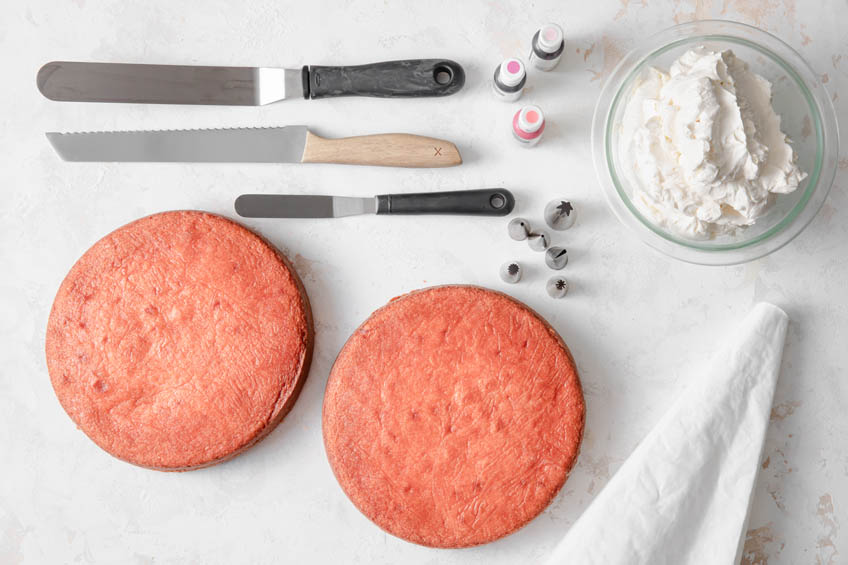
Tools
directions
Using a serrated knife, trim the tops off of the two round cakes so that they are level, as needed. Working with one cake at a time, cut the round cakes into hearts.
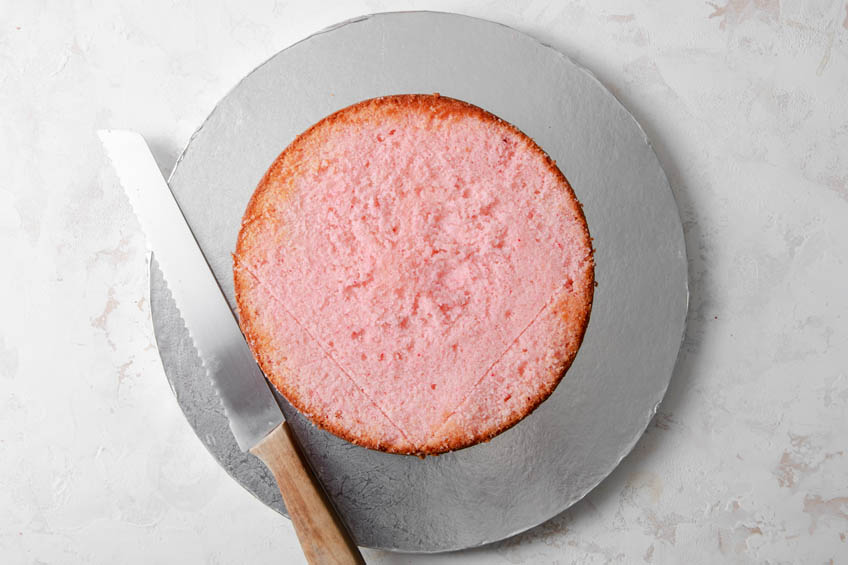
Measure 5 ½-inches from one edge of the cake to another edge. Cut off the rounded portion. Starting from the same point, repeat on the other side. The point of the heart should be close to a 90-degree angle.

Take the two cut portions and place them on the opposite side of the cake and gently curve to create a heart. Glue the pieces together with buttercream and press gently to secure. Repeat with the second cake.

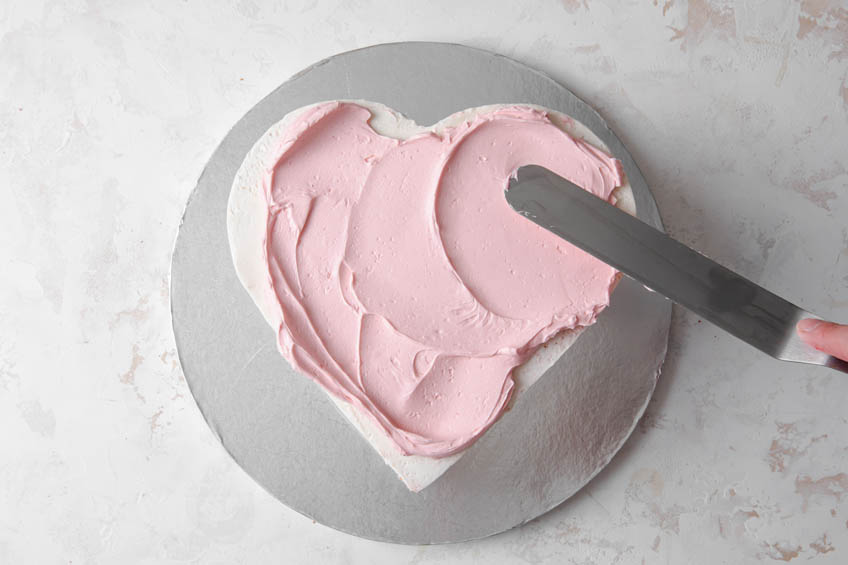
Dab a small amount of buttercream in the center of the cake board and place one of the cakes on top. Spread a layer of buttercream over the top of the cake, about ½-inch thick. Place the second cake on top. Use an offset spatula to spread a thin layer of buttercream all over the cake. Chill the cake in the refrigerator for 15 minutes to lock in any crumbs.
Meanwhile, tint about 2 cups of buttercream pink and 1 cup of buttercream purple. Leave the remaining buttercream white (you should have at least 1 cup remaining).
Remove the cake from the refrigerator and spread a top coat of pink buttercream all over the cake. Use an offset spatula to spread the buttercream into an even layer. Smooth out the sides of the cake using an icing smoother or bench scrape. Don’t worry too much about the buttercream being perfectly smooth since it will be covered in more icing.
Fill piping bags with various piping tips with the buttercream and get decorating!
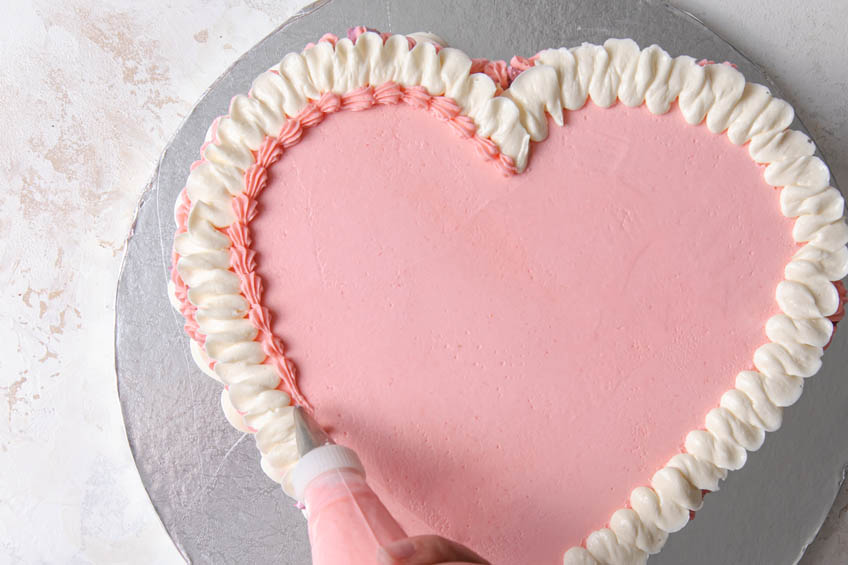
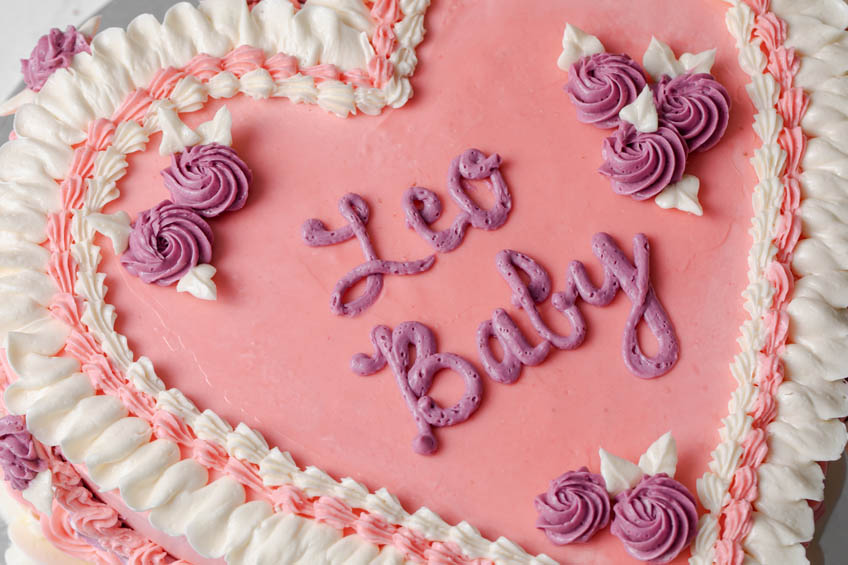
For the large white border, use a 1M star tip. Pipe a shell border around the base of one side of the cake, starting on the rounded top and finishing at the point. Repeat on the other side.

Use a smaller star tip to pipe a reverse shell pattern just above the white shells.
For the ruffles, use a round cookie or biscuit cutter to score the side of the cake.
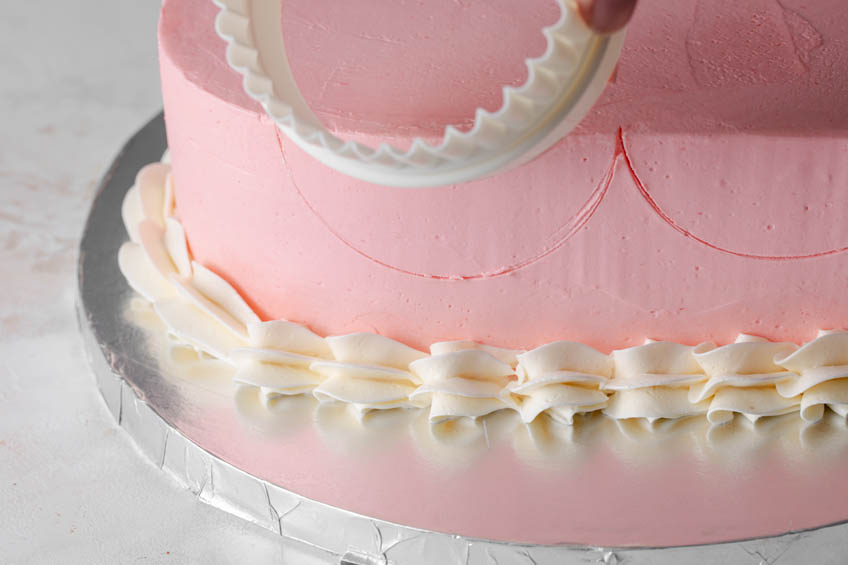
Follow the curve using a #104 petal tip to create ruffles (keeping the narrow end of the piping tip pointing down). Trim the tops of the ruffles with a small star shell border.
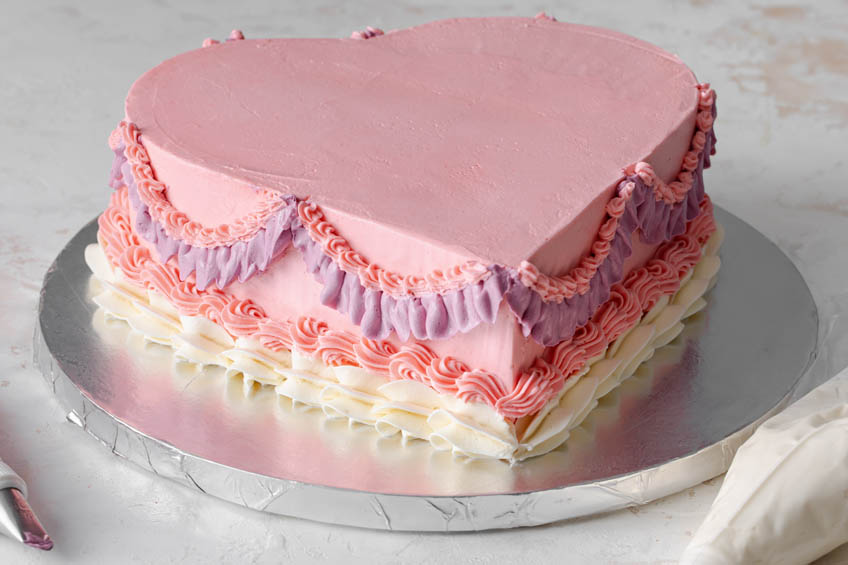
For the ruffle on top, use the same #104 petal tip with the narrow end pointing away from the center of the cake. Pipe a gentle zigzag motion around the edge of the cake to create the ruffle. Again, trim the top edge of the ruffles with a small star shell border, the ends meeting at the point of the heart.
For the rosettes, use a small star, like #36, to pipe tight spirals. Be sure to release pressure on the piping bag before pulling the bag away. Pipe rosettes in clusters on top of the cake and at the apex of each ruffle around the sides. Use a leaf tip to pipe buttercream leaves around the rosettes.
Lastly, use a round tip, like #5, to pipe your message.
Serve immediately, or chill in the fridge until ready to serve.